PC-ACE Roster Billing Guide
Roster billing is a feature of PC-ACE that allows the provider to create many nearly identical claims for flu and pneumonia vaccines quickly. PC-ACE is now equipped for COVID-19 vaccine roster billing as well.
To ensure your roster billing is coded correctly review Section 10.3.1, "Roster Claims Submitted to Carriers for Mass Immunization" in "Update to Pub. 100-04, Chapter 18, Section 10 for Part B influenza Billing" (316 KB) and Transmittal 1758: Medicare Carriers Manual Part 3 - Claims Process (189 KB) on the CMS Web site for information on roster billing field value requirements.
For information on roster billing in PC-ACE, click the Help Menu on the main PC-ACE toolbar, choose Help Topics and type “roster billing” in the Search field. The search results returned include:
-
- Adding a new roster billing
- Listing, modifying and maintaining roster billings
- Roster billing list form features
- Professional roster billing form
Creating a New Roster Billing
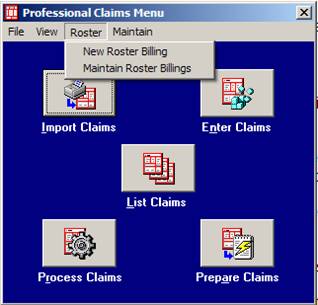
Choose Roster Billing from the roster menu.
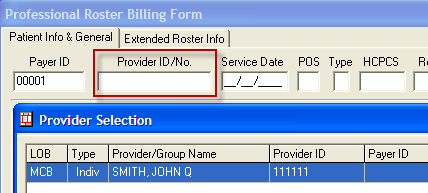
Right-click and make a selection for each field on the top row.
Select Payer ID

Select Provider ID/No.
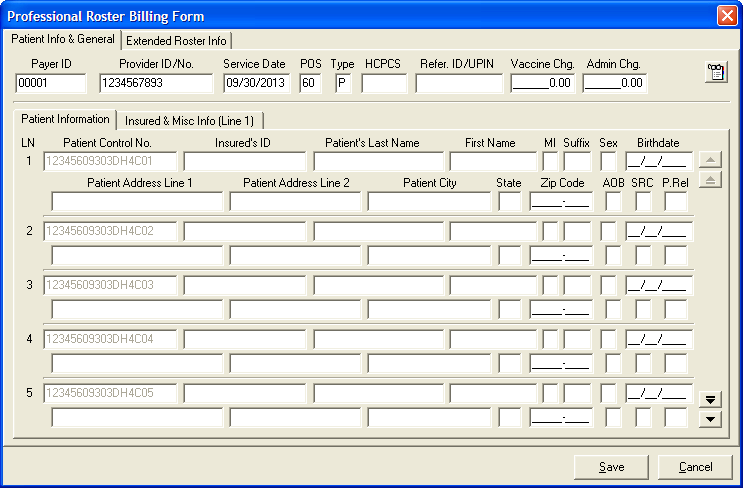
Type in the Service Date
A patient Control Number generates for each line.
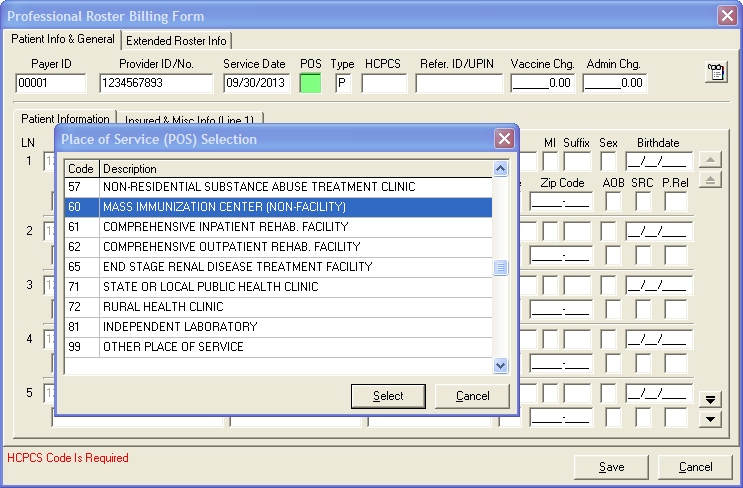
Select POS (Place of Service)
Note: Review the documents referenced above for the correct POS code required for Medicare to pay your claim.
Select the Type of Vaccine and the HCPCS Code
Select a referring physician, if necessary.

Note: Since the Physician ID and Type are not entered into the Physician record, the field in Roster Billing will remain blank on this tab whether or not you select a Referring Physician. However, the Referring Physician displays on the Extended Roster Info tab.
Type the charges into the Vaccine Chg and Admin Chg fields. Enter the patients vaccinated.If the patient is a one-time-only patient, type the appropriate information into the line for that patient.Otherwise, right-click in the Insured’s ID field, and choose the patient from the list displayed.
Repeat the above steps for each line.
Click Extended Roster Info. Tab
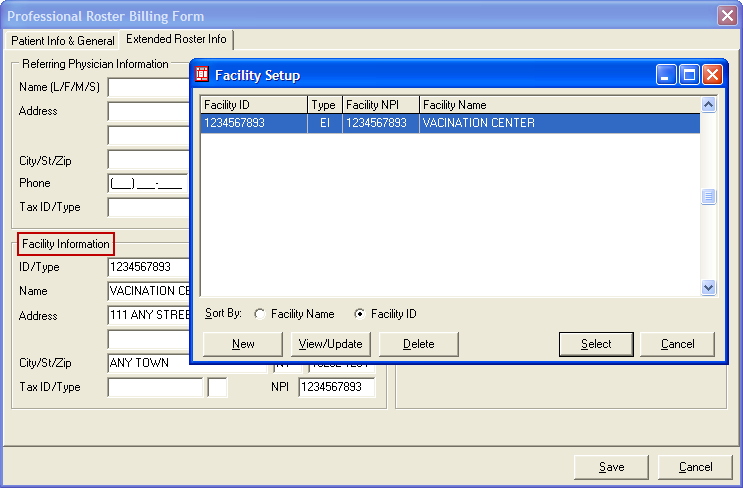
The Facility Information section, right-click in the Name field, highlight the facility’s name then click the Select button.
In the Professional Roster Billing Form window, click the Save button. A confirm window is displayed. Click the Yes button unless you wish to add more patients to this roster at a later time.

A confirm window is displayed. Click the OK button.

An Information window displays after claims generate. Click the OK button.

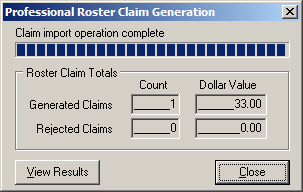
The Professional Roster Claim Generation window displays. If you wish to see a list of the claims generated, click the View Results button. Otherwise, click the Close button.
Processing and Preparing the Claims
Professional Claims menu, click the Process Claims button

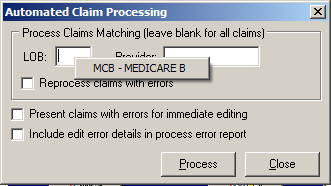
The Automatic Claim Processing window displays. Right-click the LOB field and select MCB - Medicare.
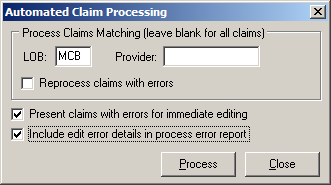
Put a check in the box in front of Present claims with errors for immediate editing and Include edit error details in process error report, and then click the Process button.
When the Confirm window displays, click the OK button.

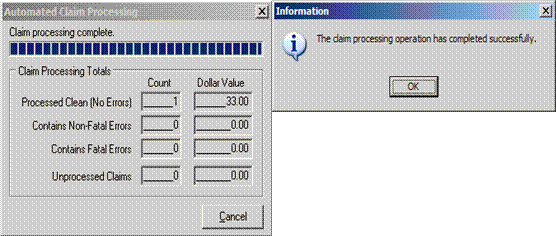
The Automated Claim Processing window displays for a few moments, and then the Information window displays. Click the OK button, and then click the Close button on the Automated Claim Processing window.
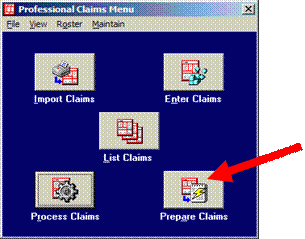
In the Professional Claims Menu, click the Prepare Claims button.
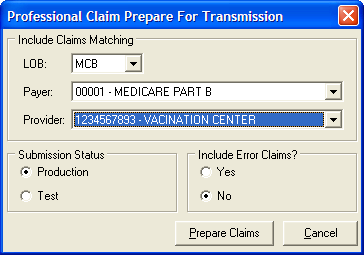
Using the drop down menus in the Professional Claim Prepare for Transmission window, select both the LOB and the appropriate Payer ID then click the Prepare Claims button.
Click OK in the Confirm window.

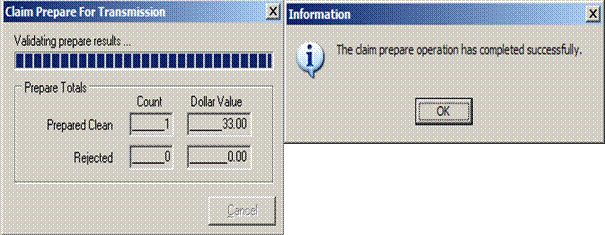
The Claim Prepare for Transmission window displays briefly, when the Prepare operation completes, the Information window displays. Click the OK button.
The Professional Claim Prepare for Transmission window now has a button titled View Results. If you would like to view and/or print the claims report, click the button. Otherwise,click the Close button.
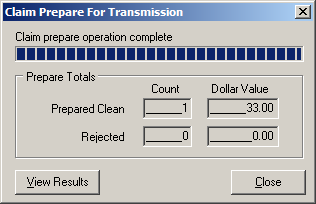
Your claims are now prepared for transmission to National Government Services.
Note: Each time you use the Prepare Claims function, the previous claims file is archived, then overwritten. You must transmit the file just created BEFORE using the Prepare Claims button again to avoid having to reactivate the previous claim file.